Mengklaim token LSK
Setiap orang yang memegang token di chain Lisk L1 berhak untuk mengklaim jumlah LSK yang sama di Lisk L2. Panduan ini menjelaskan langkah demi langkah cara menyelesaikan proses klaim.
Pemegang token Lisk memiliki jangka waktu 2 tahun mulai 21 Mei 2024 untuk mengklaim dan memigrasikan token mereka ke Lisk L2.
Persyaratan
Untuk mengklaim token LSK Anda di Lisk L2, Anda memerlukan hal-hal berikut:
- Akun di Lisk L1, dengan beberapa token LSK.
Akun tersebut harus memegang beberapa token LSK pada tinggi snapshot
24,823,618. Jumlah token LSK yang dapat Anda klaim di Lisk L2 adalah sama dengan jumlah yang Anda pegang di Lisk L1 pada tinggi snapshot tersebut. - Versi terbaru dari Lisk Migration Wallet telah terpasang (3.0.3)
- Akun di Lisk L2 dengan sejumlah kecil ETH, untuk membayar biaya gas. Jika Anda perlu bridge token ETH dari Ethereum ke Lisk, harap merujuk ke salah satu bridge yang tersedia.
- Jika Anda memiliki wallet perangkat keras Ledger, Anda memerlukan versi terbaru dari aplikasi Lisk yang terpasang (Lisk legacy 4.0.0).
Proses klaim langkah demi langkah
Panduan ini untuk akun reguler. Jika Anda memiliki akun multisignature, harap merujuk ke panduan klaim multisignature.
- Buka Halaman Klaim Token di Lisk Portal di browser.
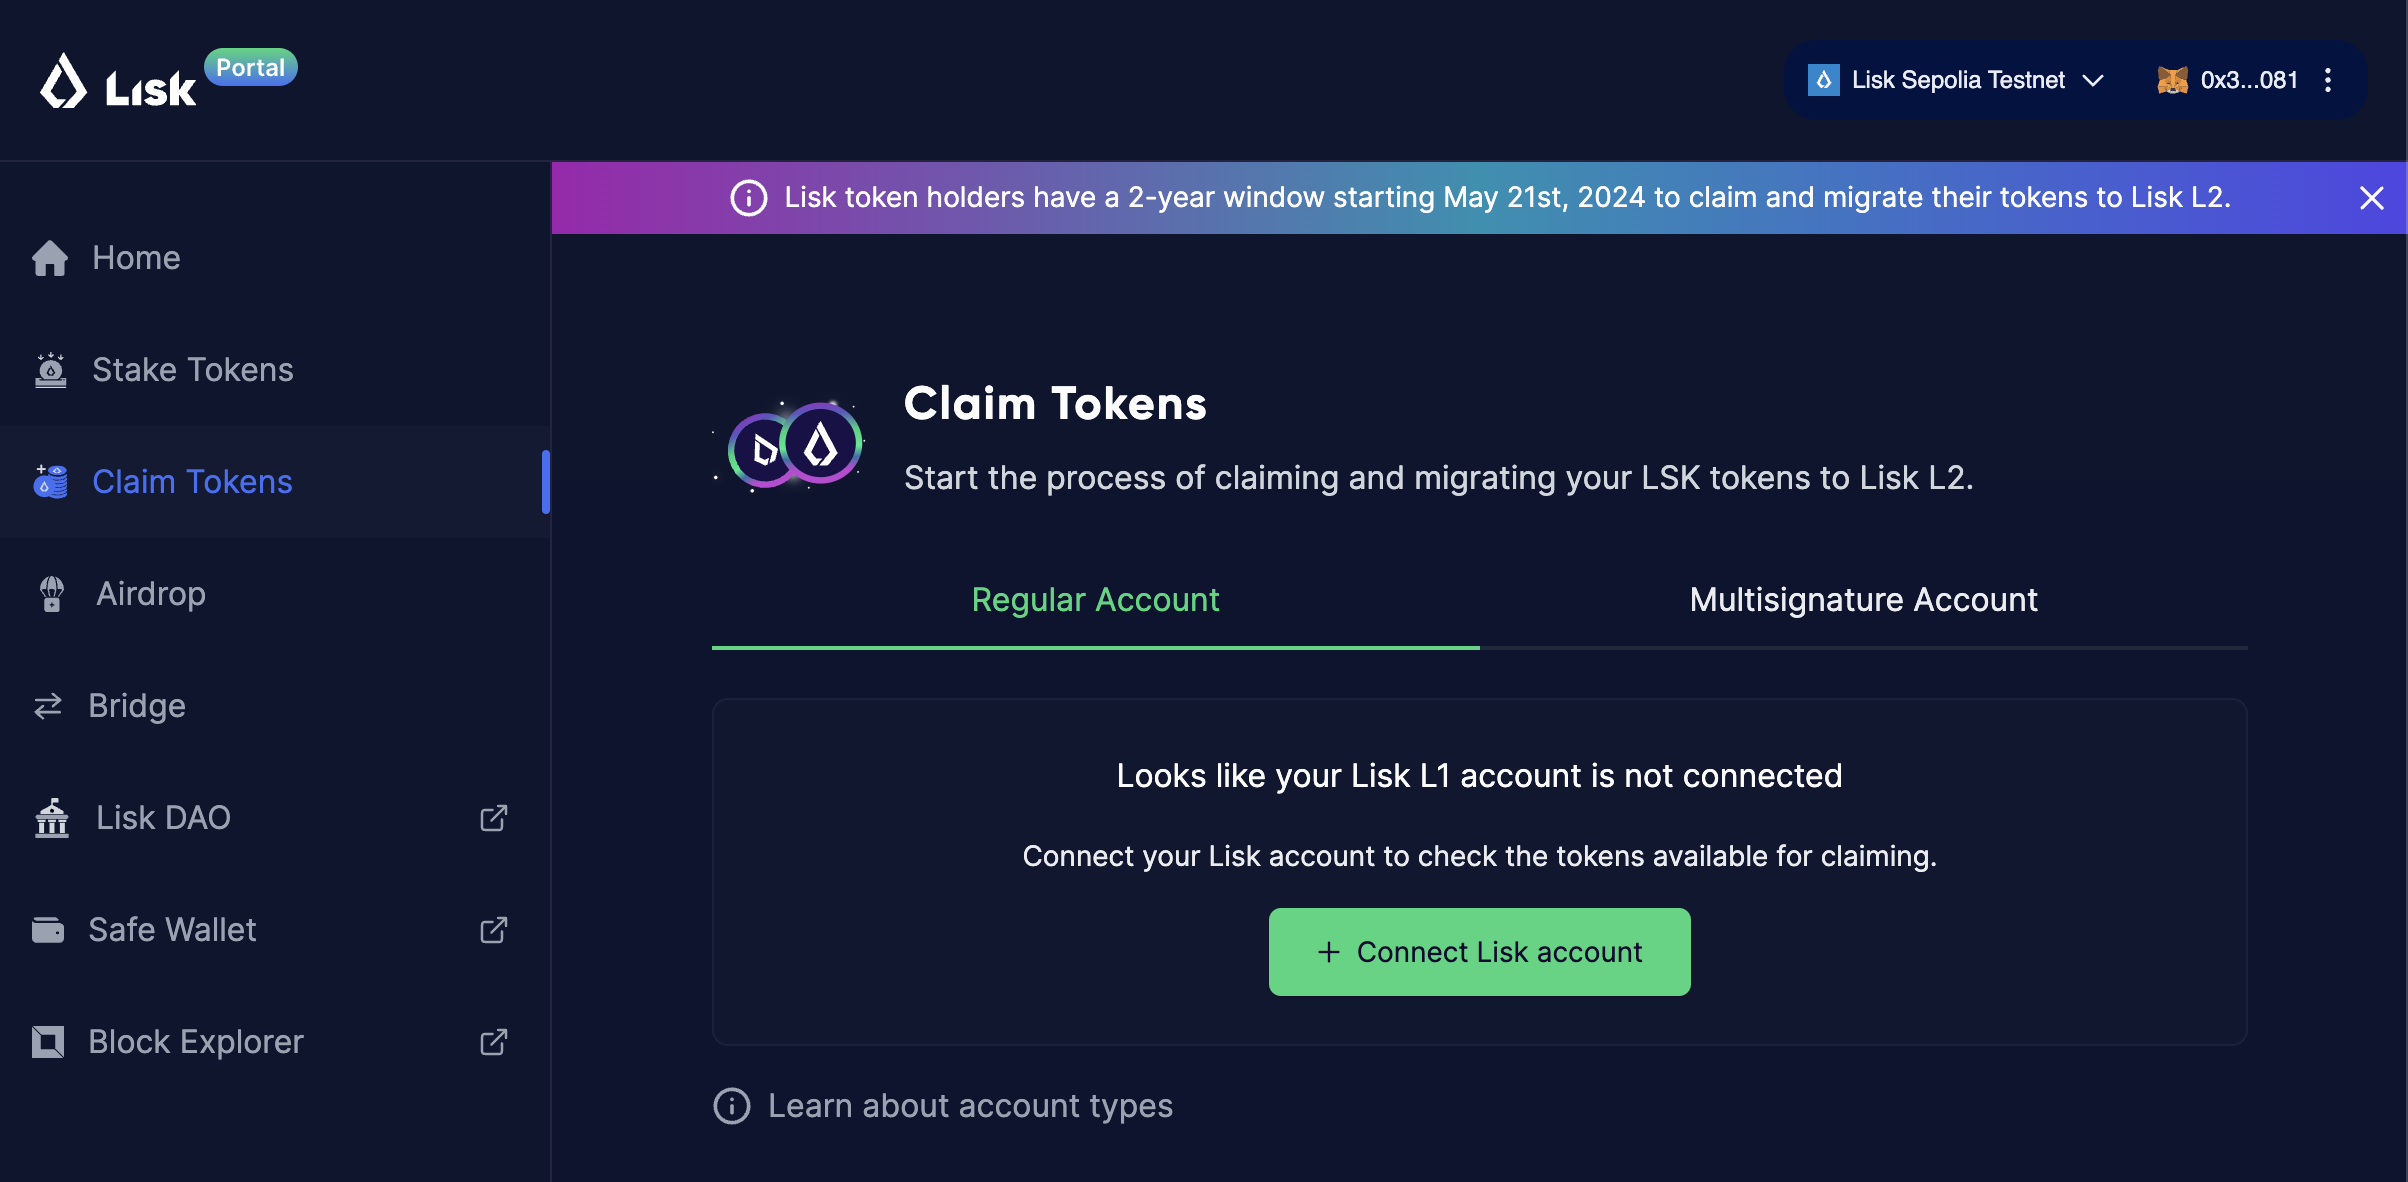
Jika Anda belum melakukannya, sambungkan wallet Anda dengan portal di pojok kanan atas. - Di Halaman Klaim Token, klik tombol
Connect Lisk account. Ini akan membuka prompt WalletConnect. - Salin URI koneksi dengan mengklik tombol di sebelah
Connect your wallet. - Buka Lisk Migration Wallet dan masuk dengan akun yang akan Anda migrasikan.
Pastikan Anda memiliki versi terbaru dari Lisk Migration Wallet yang terpasang (3.0.3).
Anda dapat memverifikasi versi dengan mengklik tombol
Lisk>Aboutdi menu wallet. - Pergi ke halaman
Applicationsdan klik tabWallet connections. - Sekarang, klik tombol
Connect Wallet.
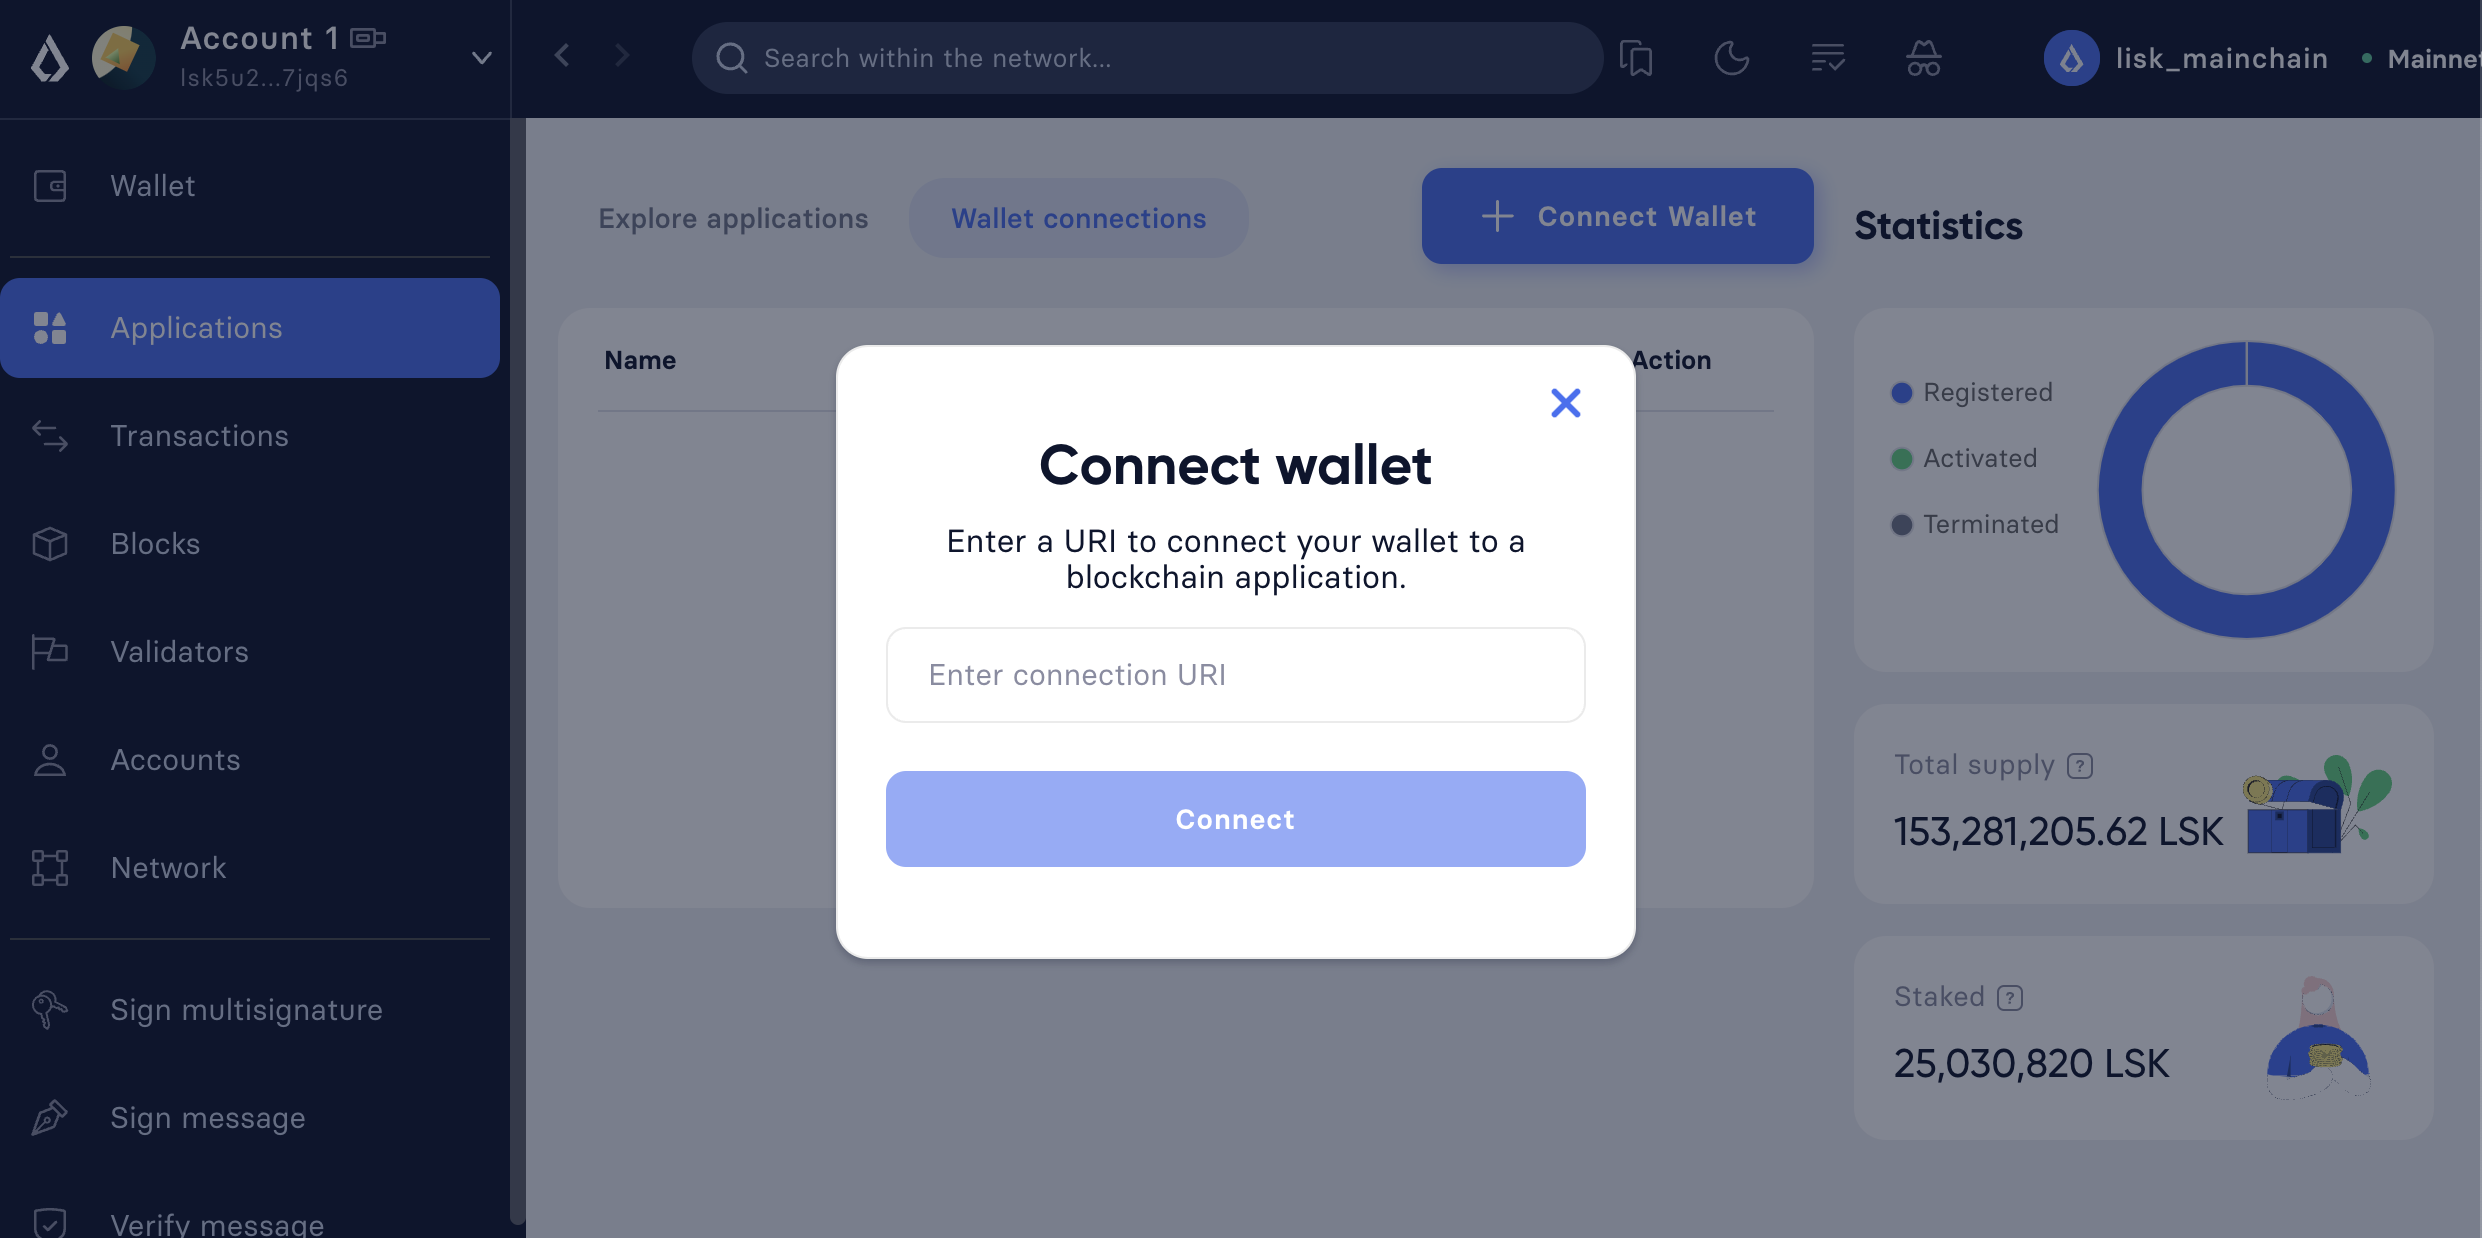
- Tempelkan URI koneksi yang baru saja Anda salin di langkah 3 dan tekan
Connect. Ini akan membuka prompt yang menampilkan semua akun Anda yang tersedia.
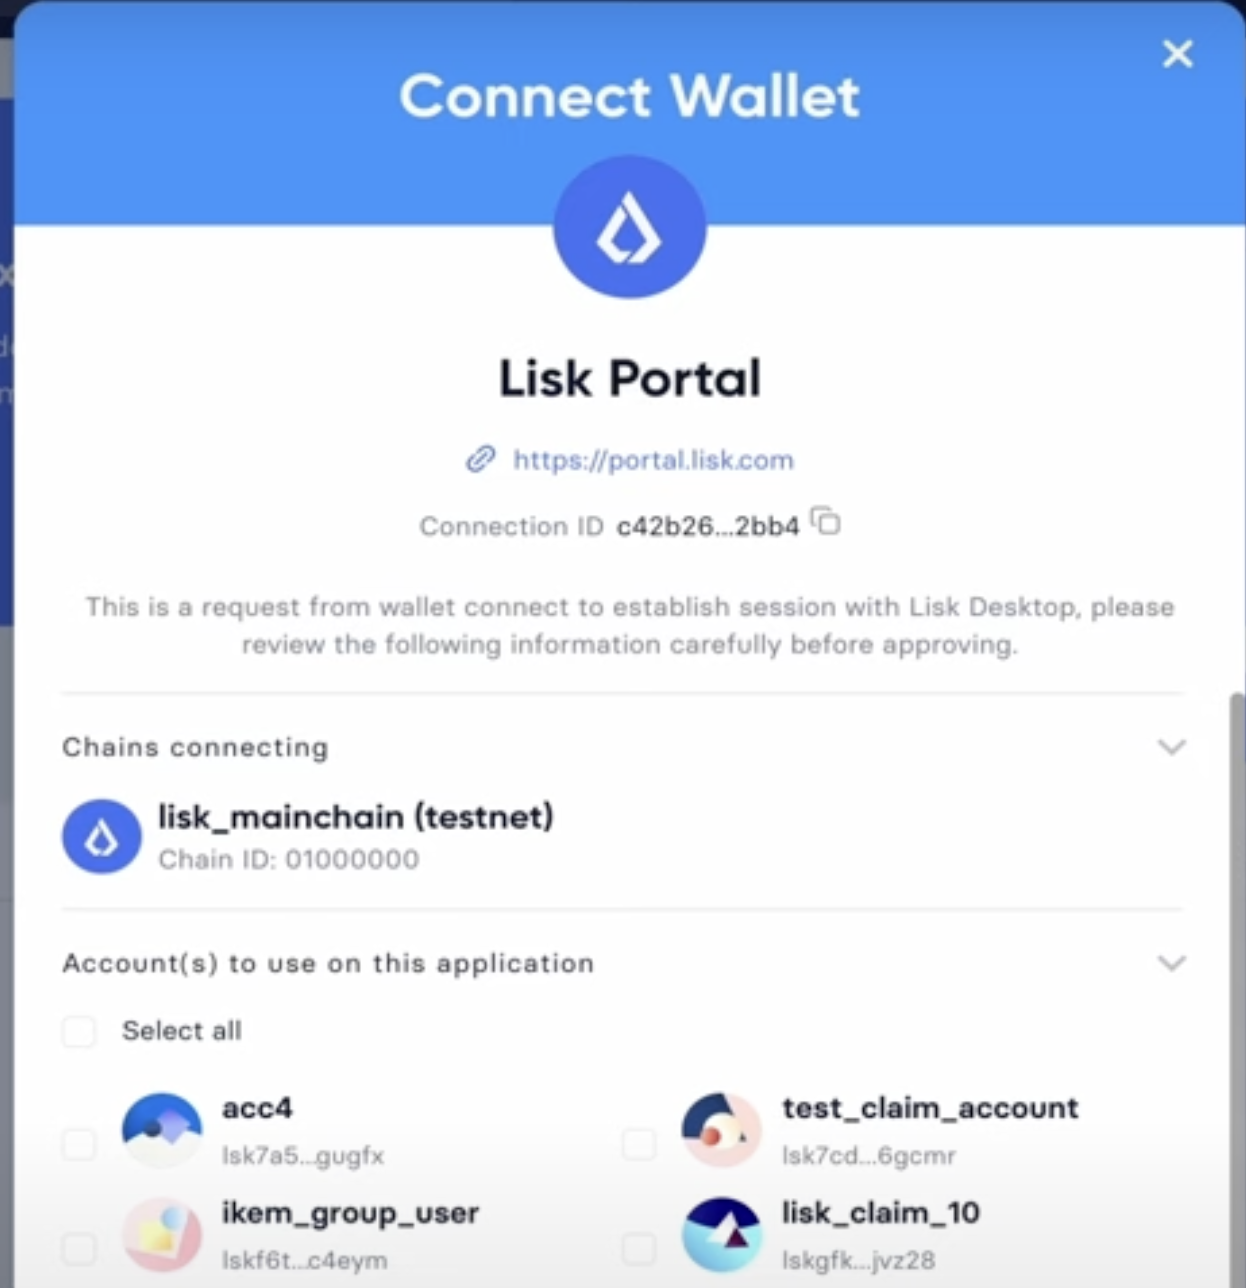
- Pilih akun yang ingin Anda migrasikan token LSK-nya dan klik tombol
Connect. - Sekarang kembali ke Lisk Portal, Anda akan melihat jumlah LSK dari akun L1 yang Anda pilih di langkah 8, siap untuk diklaim.
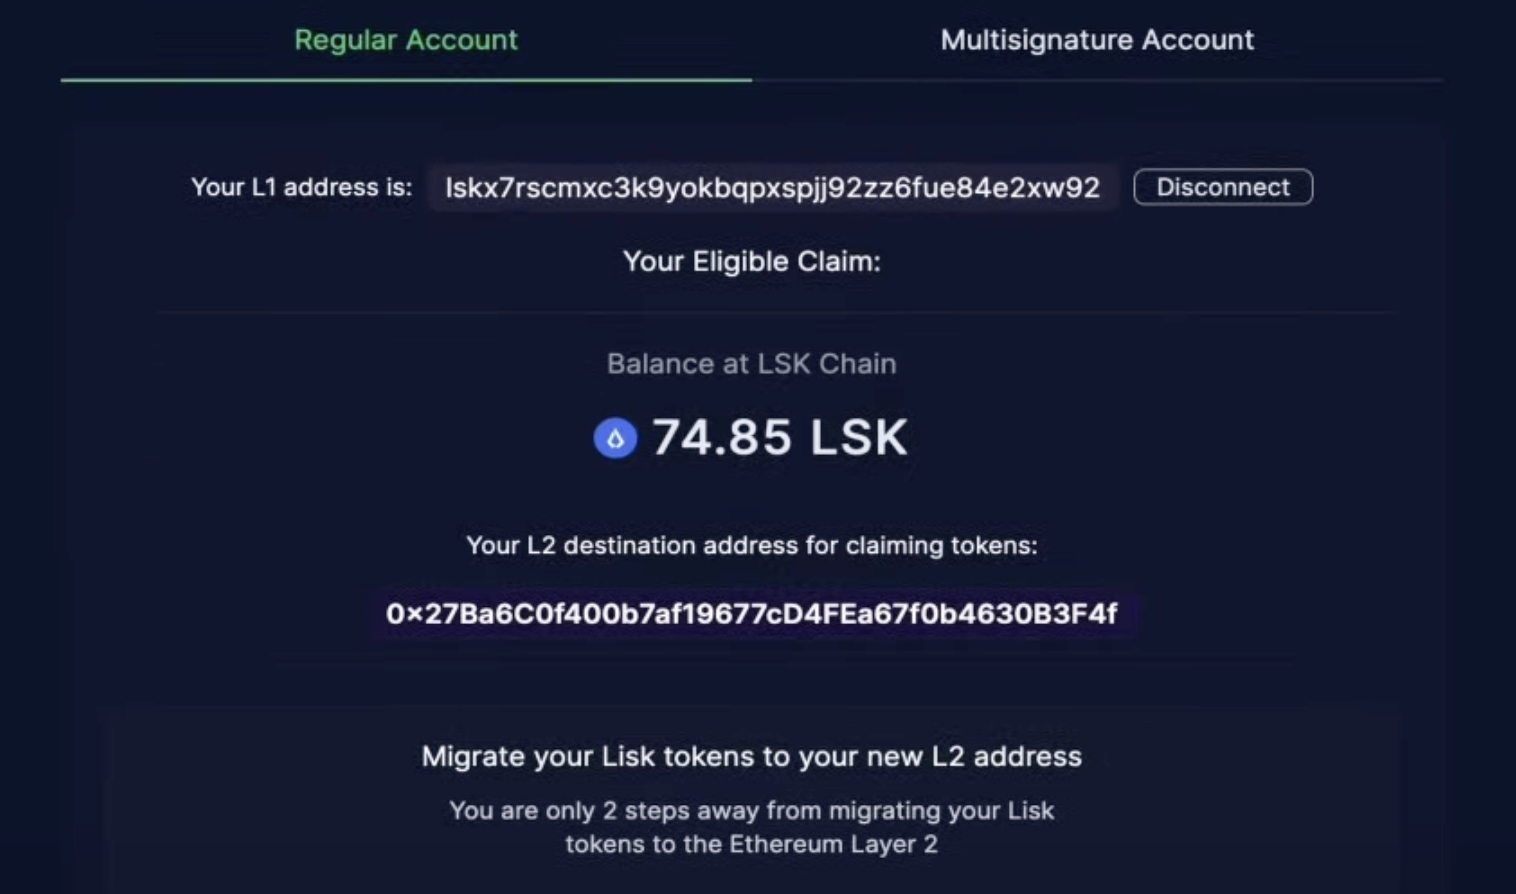
- Klik tombol
Sign message, yang akan membawa Anda kembali ke Lisk Migration Wallet, di mana Anda perlu menandatangani pesan migrasi di Lisk L1.

Klik tombolContinuedua kali dan konfirmasi dengan memasukkan kata sandi Anda, untuk menandatangani pesan migrasi di Lisk L1.
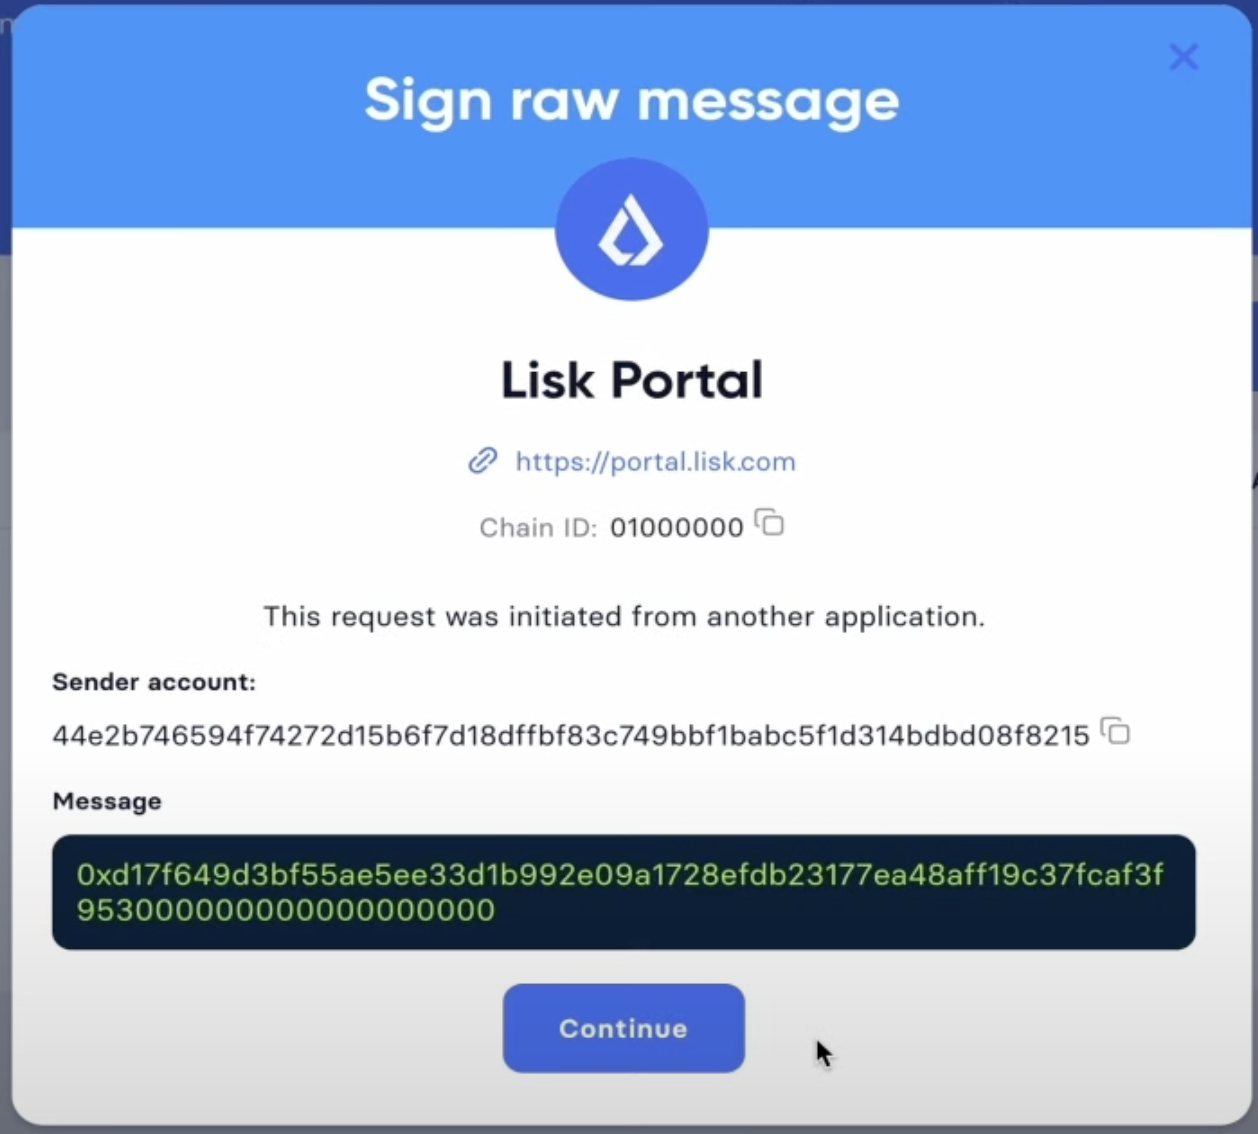
Ketika Anda melihat tanda terima transaksi di jendela, tutup untuk menyelesaikan proses.
Anda akan memerlukan sejumlah kecil ETH di Lisk L2 untuk membayar biaya gas untuk transaksi klaim di langkah berikutnya. Untuk bridge ETH dari Ethereum ke Lisk, Anda dapat menggunakan salah satu bridge yang tersedia.
- Kembali ke Lisk Portal.
Anda akan melihat bahwa tombol
Sign messagetelah berubah menjadiSubmit Claim. Klik tombol untuk menyelesaikan proses klaim di Lisk L2.

Ini akan membuka prompt wallet, di mana Anda dapat memverifikasi klaim yang akan Anda buat. KlikConfirmuntuk menyelesaikan klaim token LSK Anda.
Itu saja! 🎉 Anda telah berhasil mengklaim token LSK Lisk L1 Anda di Lisk L2.
Setelah Anda menyelesaikan proses klaim, Anda dapat memeriksa tanda terima transaksi di halaman klaim di Lisk Portal, untuk memverifikasi bahwa klaim token LSK telah berhasil dilaksanakan.
Untuk melihat saldo token LSK yang baru dipindahkan ke Lisk L2, Anda dapat memeriksa saldo akun Anda di BlockScout dengan memasukkan alamat akun Anda dan mengklik tab Tokens.
Jika Anda ingin melihat saldo token LSK Anda di MetaMask secara langsung, Anda dapat mengimpor token LSK ke MetaMask.